The steps of my glass art process
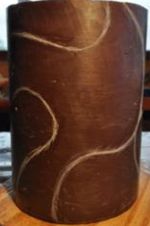
To begin… I melt brown microcrystalline sculptural wax in an electric fry pan and then pour it into a cardboard tube to make a solid, “blank” wax cylinder for each piece. The tube varies in height and diameter depending on my initial idea for the sculpture.
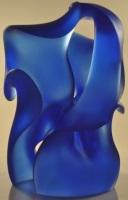
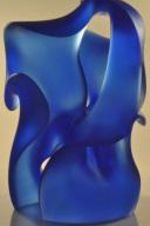
For this example, I’ll use Blue Shift.
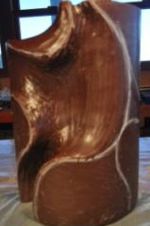
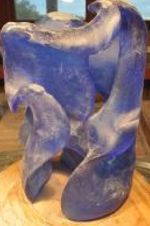
Once the wax cylinder cools, it’s ready to go. I draw initial design lines on the wax surface. But, as I sculpt, the lines go away, so my internal visualization becomes my guide.
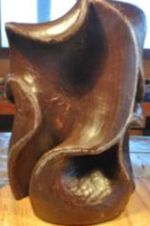
When the “rough” sculpture is completed, I sand it with coarse emery sandpaper. This is a particularly perverse process. The words sandpaper and wax just do not belong together.
The last step in this stage involves my rubbing the piece down with kerosene to remove the sandpaper scratches. Otherwise, in the next step, the scratches would show up.

Off to the foundry
This is where the “lost wax” process is employed – at the foundry. Prior to casting, solid wax sprews are attached to ensure that the glass flows evenly to all parts of the piece. In the wax steam-out step (described later), the wax sprews become hollow channels through which the melted glass will move into the sculpture. And later in the process, they themselves become solid glass – from which I often create pendants for my wife!
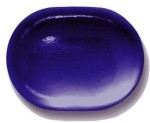
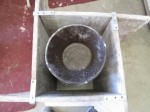
A wax “cup” is also built and attached to the form to hold solid glass billets in the kiln. My sculptures on average require 15 billets, each one weighing approximately one
kilo. (An example is pictured here: Cobalt Blue billet by Gaffer Glass.)
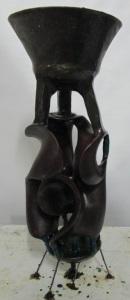
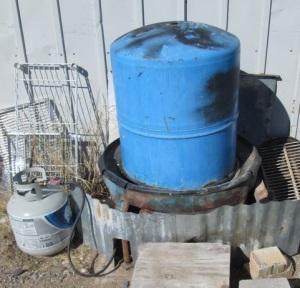
Then the wax piece with added sprews and cup is completely encased in at least 2 inches of plaster (aka: investment).
Lost Wax
When the plaster is cool and hard, it is turned upside down and the wax is steamed out (lost wax).
Photos show the elements involved: a propane tank providing heat to a water tank for boiling water to create steam to melt out the wax from inside the inverted plaster mold. What remains is a negative image of the original form inside the plaster. (Not pictured)
Firing
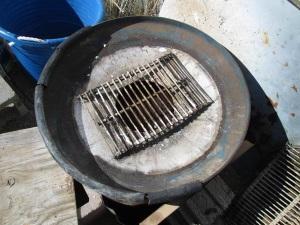
The hollow plaster mold is then inverted, cup-side up, placed into a kiln, and glass billets are loaded in.
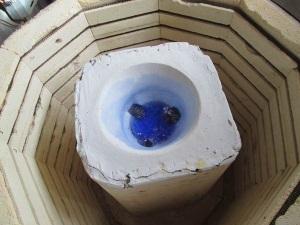
A computer program is initiated to very slowly raise the kiln temperature to about 1500°C. The glass begins to slowly melt (photo provides a peak into the kiln after the billets have begun to melt) and begins to fill the voids. Because the glass is the consistency of taffy, this process takes a long time and inevitably traps air inside the mold.
Since there is no place for the air to go, it is not uncommon for some bubbles to form — a signature mark of “closed mold, kiln cast glass.”
When the mold is full, the temperature is slowly reduced to about 850°C where it will remain for days, weeks or months depending on the glass total volume and thickness. This is the annealing process.
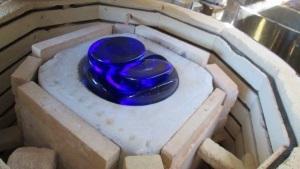
When the pre-calculated amount of annealing time ends, the temperature is slowly reduced to room temperature, and the kiln is opened (photo reveals that the billets have melted down into the casting).
Divesting
The mold is then broken apart and divesting begins. Chipping the plaster off is a lot like an archaeological dig…very slow and very careful. Then the piece emerges, and we find out if my new born made it through the process.
I find this whole adventure at the foundry quite unnerving. I feel that there should be some prayers, incantations or sacrifices offered to the “gods of the kiln.”
The process is at least as much art as it is science. In spite of all the knowledge and skill applied, it can go catastrophically wrong and all the creativity, time and money is lost.
Note:
I wish to express my gratitude to Richard Mole who has cast the majority of my work. What I do could not be done without him. Visit his website.
Survival of the fittest
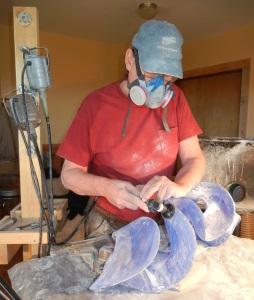
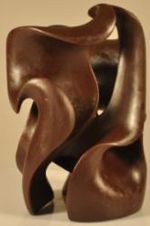
If the piece survives, when I get it back from the foundry, it can look like alligator hide – rough, scaly, nasty and many of the details lost or distorted. So I begin the “cold working” process of grinding and then sanding. Grinding the surface is done with a 1 inch diameter stone wheel connected to a flexible shaft connected to a motor. The tool looks like an over-sized dentist drill.
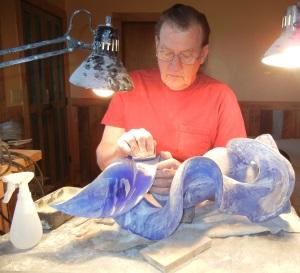
I then hand sand the piece inside and out with 60 grit diamond sandpaper to remove the tool marks from grinding – as seen below while sanding Blue Tango (not Blue Shift). Continuing, I fine tune the original profiles and lines, then work through two more hand sandings at 120 grit and 220 grit to complete the detailing for a satiny finish.
The final step is to apply a sealer to protect the finish and aid in later cleaning.
And in time…
This entire cold working process takes from two to three weeks depending on the size and complexity of the piece. Blue Shift took two and a half weeks. Often the degree of difficulty of access to the interior determines the finishing time much more so than the size.
Blue Shift definitely fits that category!